

 For Lizzy’s
face, I started by cutting the photo down to the right size then making sure
it’s on 300dpi. Using the curves tool, I then changed the lighting of the photo
to make it look how I wanted. Next I used the dodge tool to get rid of any
under eye circles and then colouring them in using the brush tool once I’d
collected the right colour using the eyedropper tool. Using the spot-healing
tool, I got rid of any blemishes to create an airbrushed effect. Next I created
a new layer, coloured in the lips the colour I wanted them using the brush tool
and then went onto the layers blending options and put it on soft light and
played around with the opacity till I got the colour I liked. Going back on the
background layer, I lightly used the burn tool under her chin to create a
slimmer look. I also thickened her eyeliner by created another layer and doing
the same as I did on the lips.
For Lizzy’s
face, I started by cutting the photo down to the right size then making sure
it’s on 300dpi. Using the curves tool, I then changed the lighting of the photo
to make it look how I wanted. Next I used the dodge tool to get rid of any
under eye circles and then colouring them in using the brush tool once I’d
collected the right colour using the eyedropper tool. Using the spot-healing
tool, I got rid of any blemishes to create an airbrushed effect. Next I created
a new layer, coloured in the lips the colour I wanted them using the brush tool
and then went onto the layers blending options and put it on soft light and
played around with the opacity till I got the colour I liked. Going back on the
background layer, I lightly used the burn tool under her chin to create a
slimmer look. I also thickened her eyeliner by created another layer and doing
the same as I did on the lips.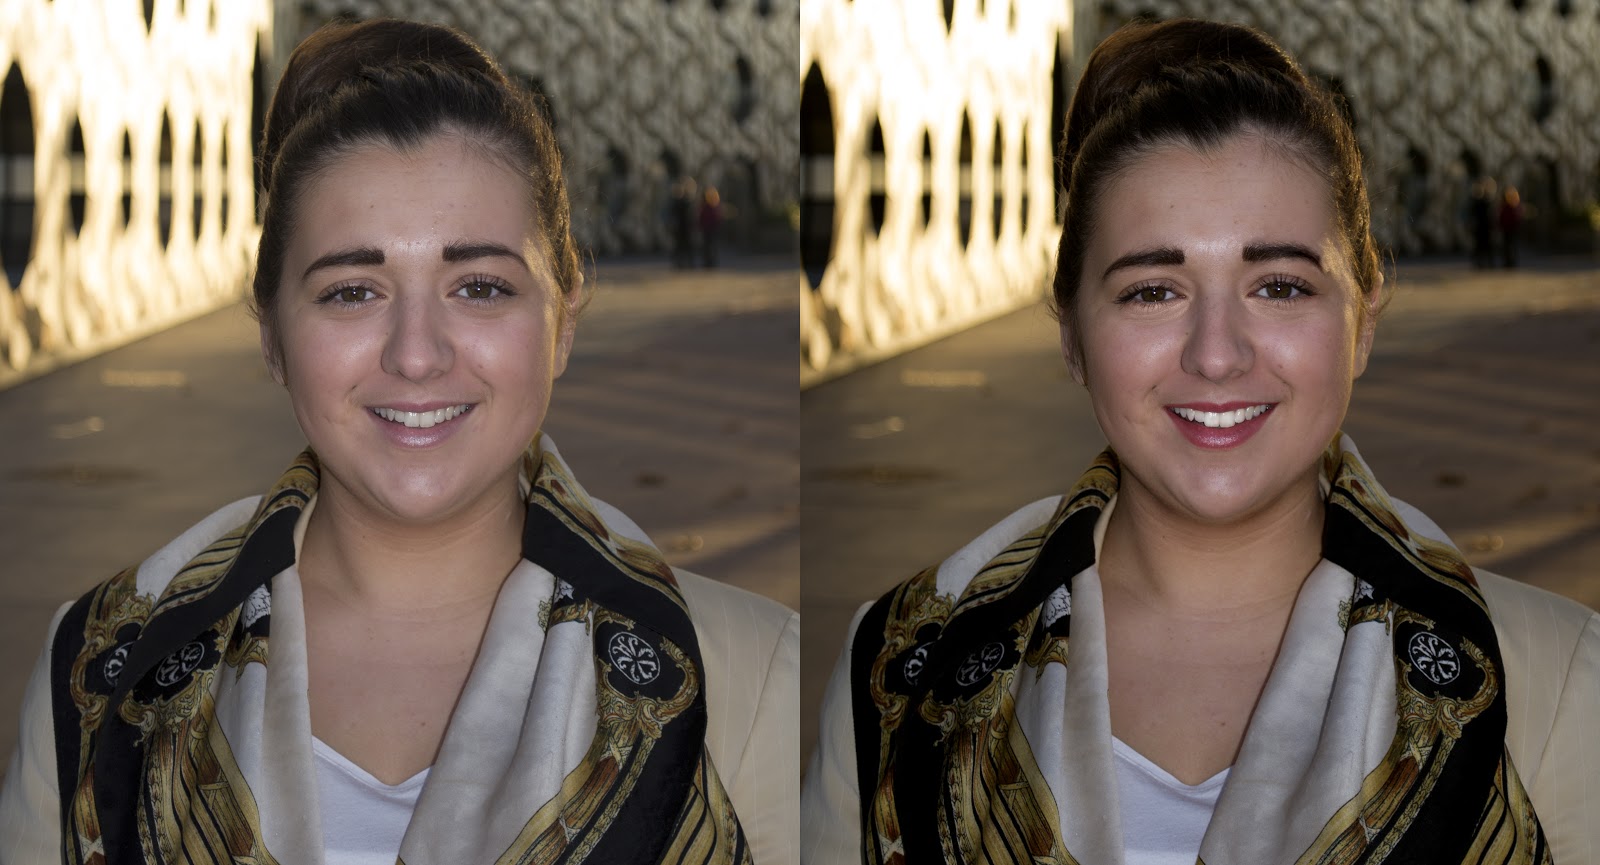
 I did the same as the photo before by making it 300dpi and
cropping it. I then adjusted the curves to the lighting I thought looked best
and removed any blemishes using the spot-healing tool. I also used the dodge
tool to remove under eye circles and filled the colour with a suitable match,
which I found with the eyedropper tool once again. I created a new layer, used
the brush tool to colour in the lips and again edited the blending options to
soft light to create a fuller, darker lip and make it more pronounced in the
photo. I also did this to Jessie’s eyebrows. I used the burn tool lightly under
her chin as well to slim out her face.
I did the same as the photo before by making it 300dpi and
cropping it. I then adjusted the curves to the lighting I thought looked best
and removed any blemishes using the spot-healing tool. I also used the dodge
tool to remove under eye circles and filled the colour with a suitable match,
which I found with the eyedropper tool once again. I created a new layer, used
the brush tool to colour in the lips and again edited the blending options to
soft light to create a fuller, darker lip and make it more pronounced in the
photo. I also did this to Jessie’s eyebrows. I used the burn tool lightly under
her chin as well to slim out her face.
I made the photo 300dpi and
cropped it down to size. I edited the curves to make the photo less yellow. The
background is quite blue, but the skin tone looks more natural to me by doing
this. After editing the curves, I noticed Holly’s face was a slightly different
shade to her neck so over this layer, I used the brush tool lightly over the
neck to even out the tone and make it look like it matched better. I picked a
colour using the eyedropper tool once again but tried a few different places
till I got what I thought was the best shade. I wanted to bring out the colour
in her eyes more as well as they blended into the pupil colour so I made
another layer and did what I’d done with the lips before but around the eye and
tried to make it slightly more green. I made the lips redder as I’d done
previously and the same with the dodge tool for under eye circles and burn tool
under the chin.

On my final portrait, I used the spot-healing
tool to get rid of pimples or redness on the face. Like the previous portrait,
Saskia’s eyes came out quite dark so I wanted to reemphasize them by using the
eyedropper tool to get what the colour of her eye was currently and adjusted it
to make it lighter then used the brush tool to draw over it and make it lighter
and then editing the blending options again to soft light. I did the same thing
with her lips to bring them out. I used the dodge tool to try softening harsh
shadows on her forehead, under her eyes and neck and then used the burn tool
very slightly under her chin.

No comments:
Post a Comment